
Инструменты пользователя
Боковая панель
eng_web:creating_a_room
Содержание
Creating a room
Program interface

Room plan
Starting the program you can see two variants – floor plan and room parametrs of the new project. By default it is a rectangular room. You can change the type of the room.

There are three standart types of rooms:
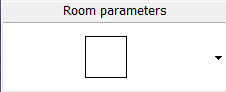 – rectangular type;
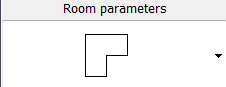 – right angle type;
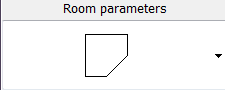 – polygon type.


Room parametres. Changing room size
There are two variants how to change the size of any room type:
- Give arbitrary size with mouse keys: highlight the wall with left click of the mouse and drag it to a needed distance while holding it.
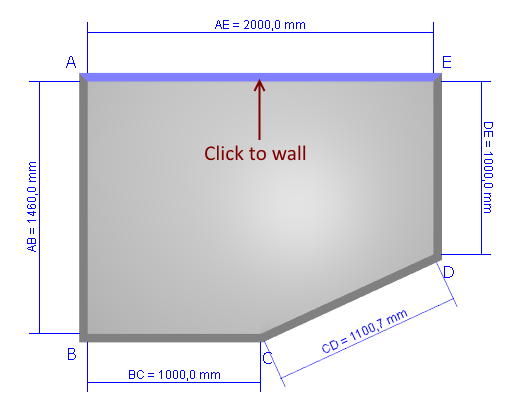
- Set accurate size in field “box size”.
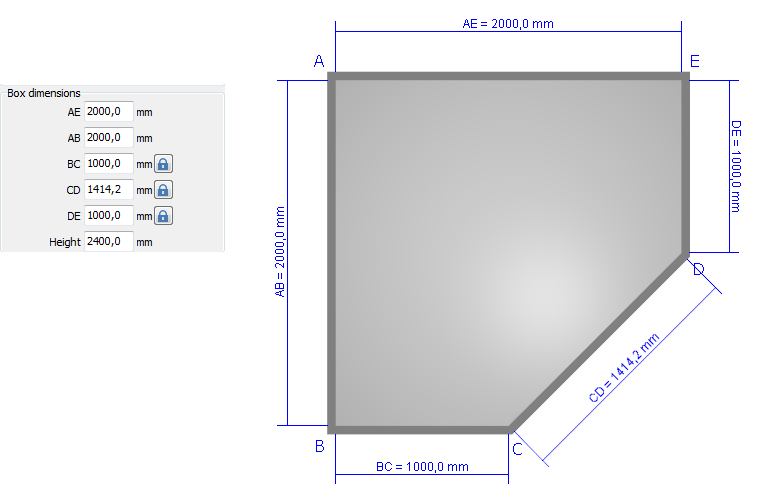
Click the “lock” icon to block the parameter changes (lines BC, CD, DE)


Changing the walls hight
You can change the hight in the “Hight” field:

Warning! Walls hight can seriously change the counting of the tiles and the price of the project itself. Thus, always ask your client the accurate hight of the walls.
Mansard
You can create a mansard type room in the program.

Creating a mansard type room is very easy:
- Chose the wall that must be lower than other walls.
Left click it in the “Room Plan” mode. “Wall settings” field will show up on the left side of tool bar panel.
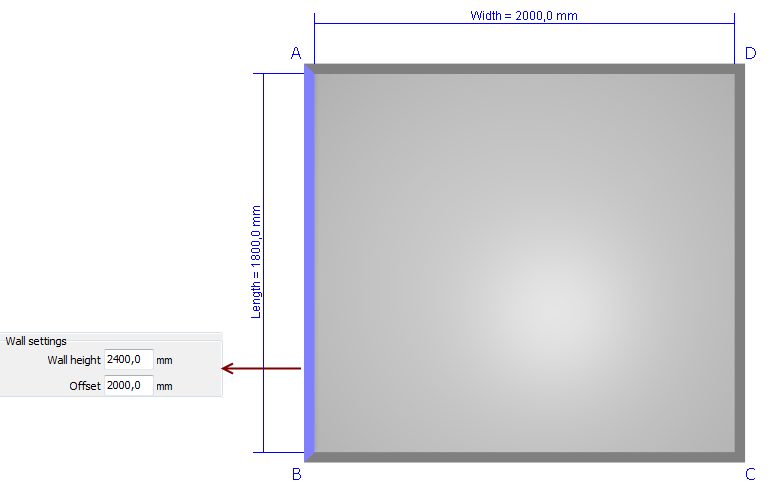
- Enter new value in the “Wall hight” field.
- Point the distance between the mansard wall line and the break line of the ceiling in the “Offset” field.

If you need to create a mansard room with more than one wall tilt, please make similar actions.
Mansard room is ready. Switch to “Tiling”, “Installation of objects” or “View” mode to check the room accuracy.
Mansard room example:

Walls, floor, ceiling coating material
You can choose material and coating color of the walls, floor and ceiling in the “Room plan” mode.
Default material is filling paste.

You can change material to any other by clicking. Material menu will show up.
Colors are following:

To change color of one of the walls, left click it. On the left side in the «Materials» panel, a new menu will appear «Wall 1 (2, 3. 4)», there you can choose the color of the walls.

eng_web/creating_a_room.txt · Последние изменения: 2020/09/28 22:37 (внешнее изменение)