
Инструменты пользователя
Боковая панель
eng_web:object_placement
Содержание
Installation of objects
Placing the objects
In the «Installation of objects» mode, you can arrange the room with some standard objects. Objects include, bathtubs, sinks, toilets, cabinets, doors, decorative additions, etc.
You can also create nishes, boxes and mirrors of certain size. They are also objects.
To place the object:
- go into the «Installation of objects»
- similar to the choice of tiles in the tiles catalog, select objects you need, in the objects catalog;
- and drag it by holding down the left mouse button at the desired point in the project.

You can always customize object appearance and move them anywhere you want.
The object may be automatically rotated when in contact with the wall. Size of the object, its standard position (for example, height of the bath relative to the floor) stay unchanged.
Position
If using a mouse fails to deliver the desired position, you can adjust the position by changing values in the field «Position» manually:

By adjusting the values of the axes X, Y, Z you can change the position of an object in space.
Dimensions
Dimensions of an object can be changed. To do this, select the object and adjust the values in the field «Dimensions» in the Toolbar:

Scaling the object
To save the proportions of the object when resizing, use the links between values of the width, height and depth of an object.
For example, to change height in proportion to the valuesbof the depth and width, click the icon  of the corresponding values of the «height».
Suppose we change the dimensions of the bath.

Below are the original dimensions of the bath.

Now bind the value of the height to other values:

Finally, we can associate all the values between themselves, in order to grow and shrink in proportion:

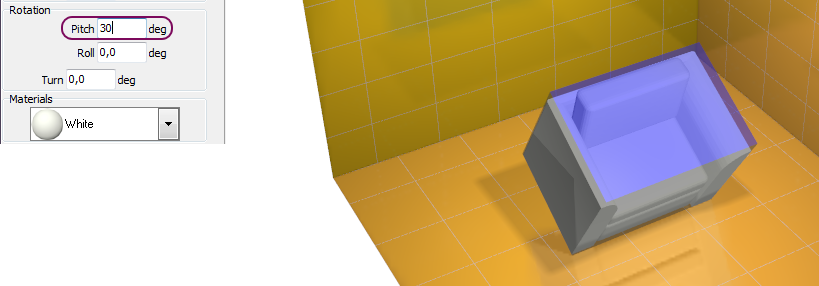
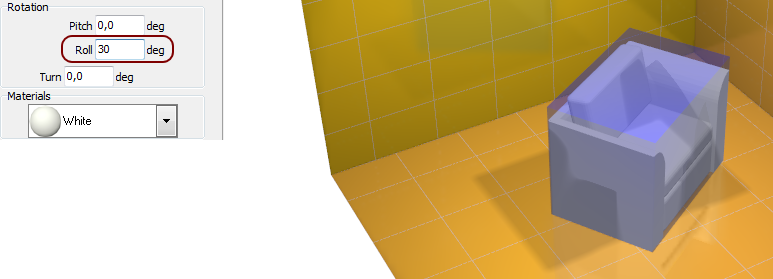
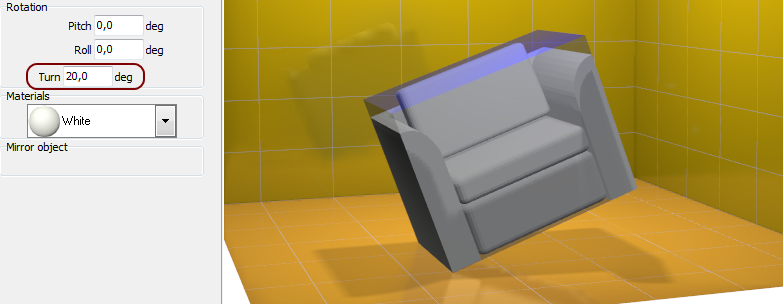
Rotation
Any object can be rotated in three different ways simultaneously. To do this, select the object, left click on block «Rotation» in the Toolbar, enter a value in the appropriate box.
- Tilt forward:
- Lateral tilt:
- Turn:


Materials
The color of any object can be changed.
To do this, select the object, left-click on the block «Materials» in the Toolbar,
Select the appropriate color.

The object can be «painted» in several colors (object details, drawing on the object), which are displayed by a list.
If this is a non-standard object (ex, carpet), then you can find out what part of the
pattern matches color only by sorting through:

Object reflection
The object can reflect.
For example, there is an asymmetric object wich should be placed in a certain zone or there is a door that must be opened in another way.
To «reflect» the door:
- select the object with left mouse button;
- in block «Mirror object» click on the «Do» button:
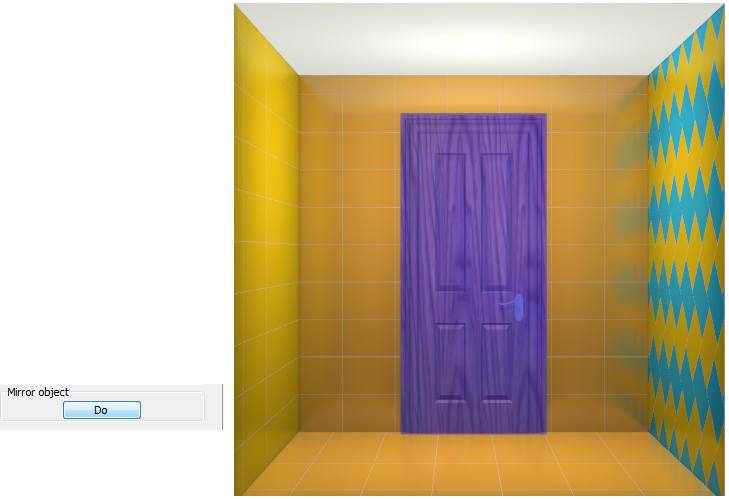

Result:

Box
Boxes are commonly used to close a part of communications (pipes), and their shape can vary. In program Ceramic Web you can create boxes of any size, but only in the form of parallelepipeds (with angles of 90°).
You can place tiles on the object «box».
The first way to create a box is described in the topic «Tiles placement».
This is a quick way to create a box in the «tile placement» with reference to the already placed tiles.
You can create a box with exact size, resize it, and remove only in the «object placement» menu.
To create a box:
- click on the tab «Box» in Toolbar;
- select the size of the box you want (width, depth, height);
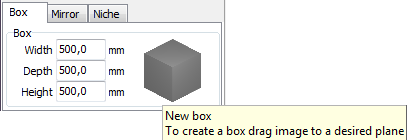
- drag the model of the box to the desired point in the project:
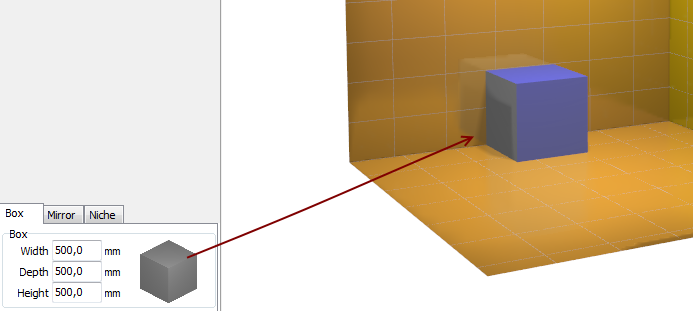


Then you can arrange it up to millimeter as required on the basis of project, repaint it, place tiles in mode «tile placement», and so on.
Niche
Niche - this is usually a small recess, in which for example there are tubes. Or it may be part of the decor. Creating a niche is completely analogous to the creation of the box with one difference: the niche should be in contact with one of the walls.
To create a niche:
- click on the tab «Niche» in the toolbar;
- select the size of the housing (width, depth, height);

- drag the housing model to the desired point in the project.

Then you can arrange it up to millimeter as required on the basis of project, repaint it, place tiles in mode «tile placement», and so on.
Mirror
You can add an object «mirror» in the project. The mirror can be of any size but only rectangular shape.
To create a mirror:
- click on the tab «Mirror» in Toolbar;
- select the size you want (width and height);
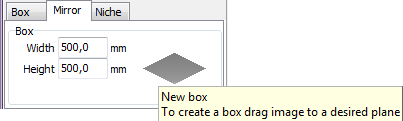
- drag the model mirror to the desired point in the project.

Then you can arrange it up to millimeter as required on the basis of project.
eng_web/object_placement.txt · Последние изменения: 2020/09/28 22:37 (внешнее изменение)