
Инструменты пользователя
Боковая панель
eng_web:tile_placement
Содержание
Tiling
Working window
To open «Tiling mode», press the corresponding icon on the toolbar:

Types of room. Surface choise for tile placement
By default, there are six standard view types available in the block «View» on the
Toolbar:

- «View left»
- «View front»
- «View right»
- «View rear»
- and 6 «View top / bottom»
Attention! Double-clicking on the «top view» (floor) switches view to the «Bottom View» (ceiling).
To rotate the room, hold down the right mouse button and move the mouse in different directions to obtain a desired angle.
To zoom in / zoom out a project, use the mouse wheel.
Catalog and Tileboard. Choosing tiles for the project
Adding tiles to Tileboard
To begin work with specific examples of the tiles, they should be added in the «Tileboard» from the «Catalog». «Tileboard» and «Catalog» are located at the bottom of the working area:

Material selection Interface can be changed by switching to «Tileboard» or «Catalogue»(see. above). By default, the mode «Buffer placement and catalog» is displayed, which shows a little of both modes.
To select the materials catalog:
- left click on the «Catalog»;
- select the necessary collection from the dropdown list.
Keep in mind that collections can be displayed as a series of folders.
If you click on the folder (highlighted in red, as shown above), you can move quickly from one collection to another by rotating the mouse wheel.
Catalog may contain several nested folders and may differ from the examples presented here. To add the desired tile from the «Catalog» to the «Tileboard» double-click on the desired tile. Last added tile in the «Tileboard» also appears in section «Sample».
Tile choice
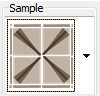
Click on tile in the «Tileboard» to add it in section «Sample».
 If «Sample» window display the desired tiles, you can determine the position in which the tiles will be placed on the wall.
By clicking on the arrows, you can change the position of the tiles (horizontal / vertical), turn it upside down, or turn it (45 °) angle.
There are two ways to place tiles on surface.
- Use the buttons on the toolbar;
- «A quick way» by (Drag-and-drop) dragging tiles.
Placing tiles using the buttons on the Toolbar
Tiling is possible on the selected surface only.
You can highlight the surface by clicking the left mouse button. Blue color of the surface means that surface is highlighted.

Click on the desired tile in«installation buffer» or «tiles Catalog» so that she was in a block «Sample.»
Now you can place this tile.
There is a row of buttons responsible for laying tiles on the left side:
- «Add row»;
- «Row above»;
- «Row below»;
- «Delete row»;
- «Replace»;
- «Move area»;
- «Add applique».
Lets see all the functions on example.
Add row
«Add row» – by clicking this button one row of tiles will be placed:

If you hold down “Shift” key on the keyboard and press “Add row”, all the selected space will be filled with selected tile, which at this moment is in the block «Sample»:

If you hold any number on the keyboard (for example, «4»), the number of rows corresponding to this number will be placed on the selected surface:

Row above / Row below
«Row above» — places a row of tiles at the bottom of the selected tile.
(if there are any tiles placed, they will be replaced)
 «Row below» - places a row of tiles on top of the selected tile.

Row on the left / Row on the right
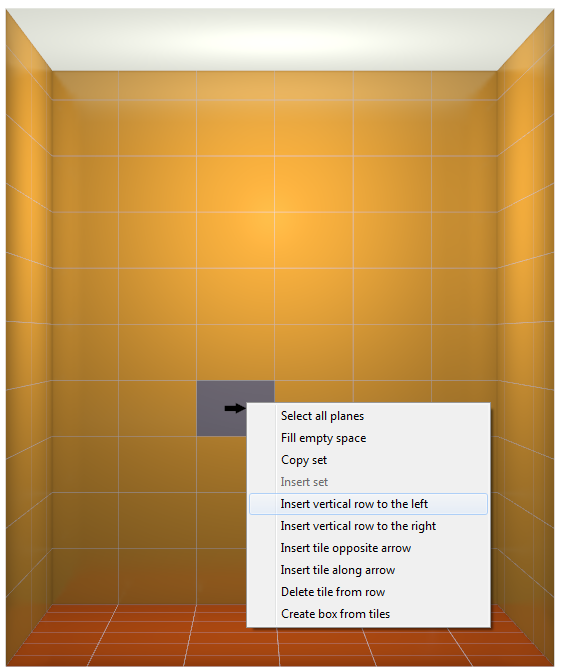
To insert a row on the left:
- Highlight the tile in respect to which you want to place a row of tiles;
- Click the right mouse button on the selected tile, then click «Insert a vertical row on the left»:

Result:

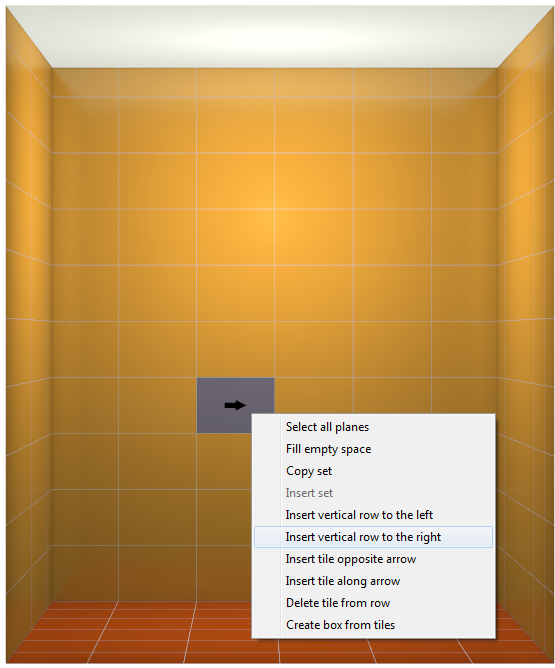
To insert a row on the right:
- Highlight the tile in respect to which you want to place a row of tiles;
- Click the right mouse button on the selected tile, then click «Insert a vertical row on the right»:

Result:

Attention! When you insert vertical rows, the orientation of tiles on the surface automatically changes from horizontal to vertical. So, for example, when you try to remove or move a row, a vertical but not horizontal row will be removed.
Deleting tiles
To delete all the tiles on the surface:
- click on any tile on the surface you want to clean;
- click on the icon
 on the toolbar or keyboard shortcuts Shift + Del (Delete). All the tiles will be removed from the surface.

To delete a row:
- highlight the tile in the row you want to delete;
- click Delete row or press the keyboard shortcut Ctrl + Delete.
Attention! By default, the row of tiles - is a horizontal row of tiles. The row direction can be changed by clicking on the icon «Change type of the selected row (vertical / horizontal)»  /
/  .
.
 /
/  .
.
Replacing tiles
«Replace» - replaces the selected tile to tile in «sample» window.
To select multiple tiles, placed near each other, select them by holding down the left the mouse button:

To select multiple tiles, placed separatly (for example, as shown above), hold on “Shift” key and click the left mouse button on all the tiles to be replaced:

Moving tiles
«Move area» - by clicking on this button you can move all the placed tiles on the selected surface:

Moving rows
Placing tiles by drag and drop
To place the tiles in this way, it is enough to click the left mouse button on the needed tiles in the Catalog, Tileboard or in block «Sample» and drag it to the surface.

First, one tile will be placed. To the left on the toolbar a block “Operation options” will appear. There, depending on the need, you can tick on needed checkboxes.
«All walls» – tiles will be placed on all the walls of the room.

«Until the end» – tiles will be placed on the whole wall.

Additional row
Also you can place a row of tiles by dragging. The blue line indicates a row, red - indicates in wich side a row will be placed.
In this case, the result is:
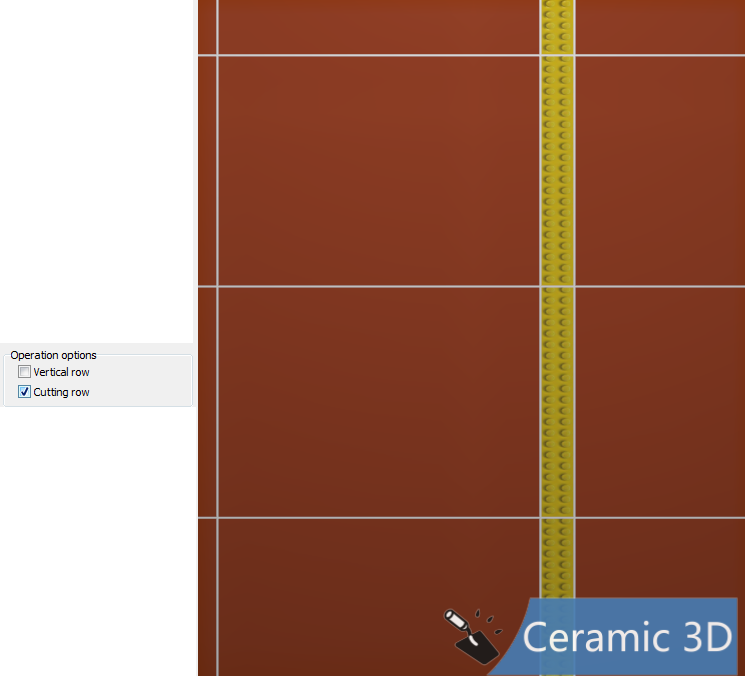
 In case you need to modify the placement of the row, for example, as shown below, it is also corrected in the Toolbar, in block «Operation Parameters»:

- «Cutting row» can be used, for example, to place tiles of different size.

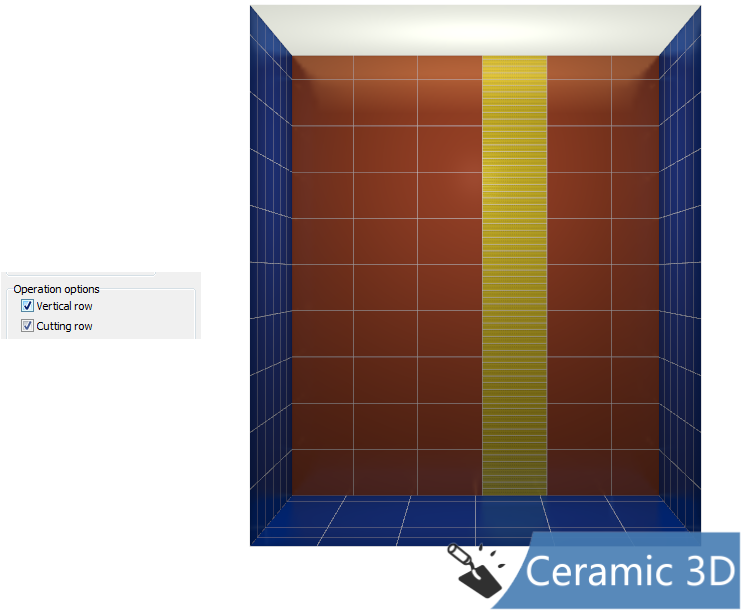
- «Vertical row» - turns the tiles in a row to a 90 degrees. Thus, a series of the same decorative tiles can look like this:


Replacing tiles
You can also replace the tiles by dragging.
Highlight the tile you want to replace one or more tiles, hold down the spacebar on the keyboard and drag the tile place a row or one tile:


Align
Align directly affects the process of placing tiles.
By default, the tile is placed from the bottom, from the center:

Similarly, the align works «right edge - bottom / middle / top »,« left edge - bottom / middle / top. »
For exaple, center + middle:

And center + top:
The only difference is in the horizontal position of the tiles relative to the boundaries of the box. Also, as an analogy to a horizontal binding, works positioning of the text in the popular text editors –  . However, the first row of tiles can be placed in the middle of the wall or on top of it.
Gap
«Gap» in Toolbar – it is the distance specified in millimeters, between the tiles. The default value is 2 mm. There is a slight depending of the tiles count from the size of the stitch.
Attention! Color of the coating in the joints between the tiles coincides with the chosen color of the surface of the box in the «Room Plan.»
Angle
«Angle» in the toolbar – it is the angle of rotation of the tiles.
To rotate the tiles on the surface at a specified angle:
- select any tile on the surface;
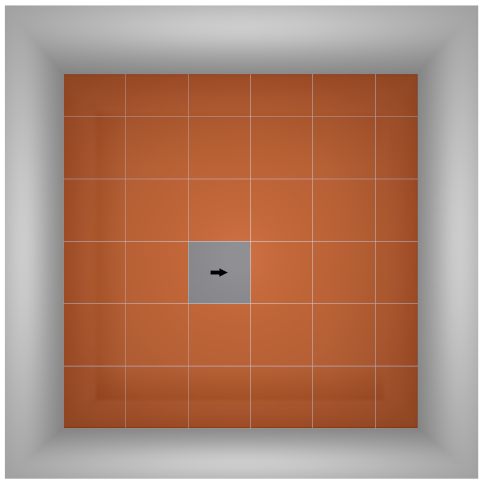
- in the «Angle» field enter the desired value (specified in degrees);
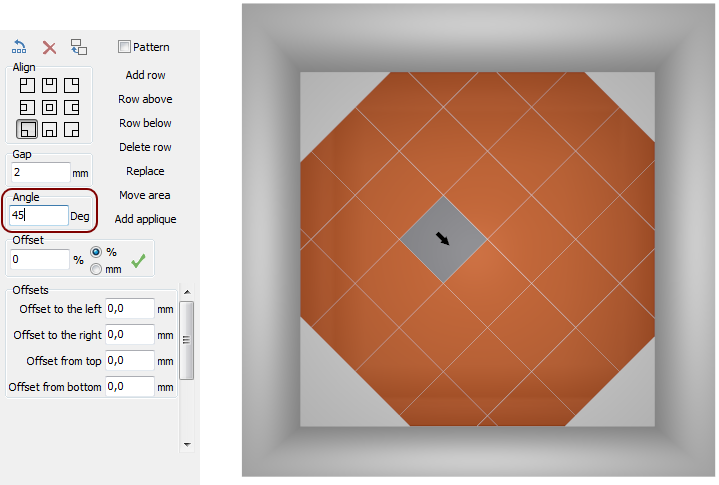
- press the Enter key on your keyboard.
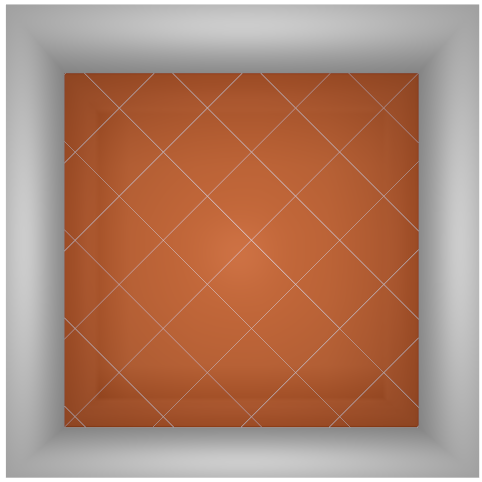


Angle of rotation of the tiles can be changed any number of times.
Also, when you drag the tiles on the surface you can change the angle of rotation the tiles through in functions of «Sample» block:

Offset
«Offset» in the toolbar — it is a value of tiles shift in rows relative to each other.
When set to «0» tiles are accurately stacked:

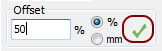
If the value is 50%, they are arranged as follows:

At 100 mm:

To apply the entered values on the surface:
- select any tile on the surface;
- enter the required value in the «Offset», check the correctness of the chosen units (percentage or millimeters) and click on the green tick:

Offset value can be specified in percents, and in absolute terms - in millimeters.
Areas
The «Add row into new area» function is available by clicking on the icon on the Toolbar.
«Area» — it is a portion of the surface of the box, where you can visually highlight tiles by changing placing (angle) independent of the rest of the surface.
Using the «Area»:

The same without «areas» function:

The first rows of tiles (the first area) are placed as usual, without any functions – «Sample» and tile angle are only indicated.
Different angles in different areas:

By default, each surface of the box is a separate area. Placing the first rows of tiles on the surface, creates a separate area.
To create a new area:
- click on the icon
 ;
; - choose another sample and the angle of tiles rotation if necessary and continue placing the rows.

To create any ammount of new areas repeat this operation.
Offsets
«Offsets» may be useful in the case of non-standard project, for example, for the construction of tile apron for the kitchen or any other option with partial stacking of wall with tiles.
In fact, «Offsets» cut off the areas of the surface where material should not be placed.
Attention! The «Offsets» field becomes available in the Toolbar, only when any surface is highlighted.
For example, it is necessary to design an apron, which should start with an 650 mm from the floor and
end at 750 mm from the ceiling:


Pattern
The pattern is used for fast placing of a set of different tiles.
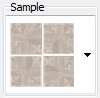
For example, in a “checkerboard pattern»:

Or in “check mark pattern«:

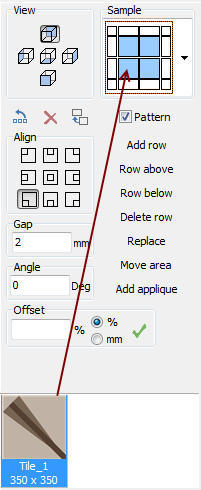
To create a template:
- Place a check mark in the check box «Template»:
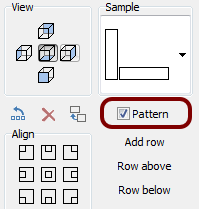
- Select the desired template by pressing drop-down menu (highlighted):
Similarly, drag the tile on all of the blank cells of the template.

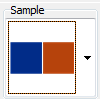

You can replace one tile to another, by drag and drop the tiles from the buffer to the cell stacking template. - Drag and drop the desired tile on the empty fields in the selected template by holding the left button of the mouse.


«Check mark» template is formed in a similar manner. To place the «Check mark» template, tiles should be of different width and height (not square) and placed in relation to each other - general to the narrow side.
To rotate the tile in the block «Sample», right-click over it, and it will rotate 90 °.

 It makes sense for the tiles in various patterns with different width and height.
Attention! If the pattern is not completely filled, a error will occur, and the tile won't be placed.
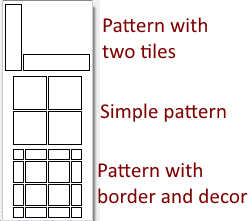
Lets look at the tiles, which are intended for such stacking.
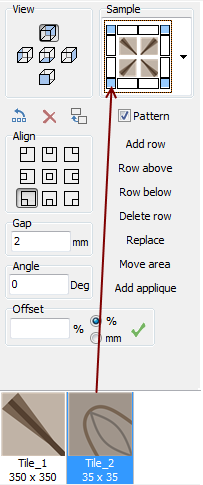
Pattern with a border - "carpet"
The most complex pattern for placing - a pattern with a border. Suitable for use:
- elements of a collection designed for such placement (square tiles at the center, border with a width equal to sides of the central tiles, corner square inserts with a side equal to the height of the border);
- tiles of equal size.
Lets look at the tiles, which are intended for such stacking.
- Check the box «template» and select from the drop down menu a needed option of placing:

- Drag and drop in the appropriate cells the tile which must be in the template.
Check the size of the tiles, which you put in!
- Select a surface and place the tiles the way you want. For exapmle:


This type of placing is most often used as a decorative inserts when placing floor tiles.
Attention! Drag and drop the tiles exactly in the cell, with respect to which it is oriented!
Laying the tiles from the template
The process of placing tile pattern similar to the normal process of placing. The difference lies in the fact that, depending on the shape of the pattern, two or more rows can be regarded as one row.
Further work with the tiles can occur as usual.
Attention! Depending on the type and size of the tiles its default angle to the surface may vary. You can change the angle of the placement if necessary (select tiles, specify the desired value in the «Angle» field and press Enter on the keyboard).
Applique
«Applique» in Ceramic Web - it is an addition of a tile or template of tiles above the placed tiles. Applique can be a tile of any size and shape.
To add a Applique on the surface:
- highlight the tiles on the surface over which a Applique should be installed;
- select the desired tile in the Tile catalog and click «Add Applique»:

- result:


Frame can be moved freely around the surface.

To make frame «anchore» to the edges of other tiles, hold it with a mouse in the area closer to the corners.
To delete a frame, select it and press the Del (Delete) on the keyboard.
You can add multiple frames on a surface. Example of frame:

Changing the size of the room. Placing tiles in space
If the tiles are already placed, but you need to change the dimensions of the room:
- go into the «Floor plan»;
- change the size of the room.
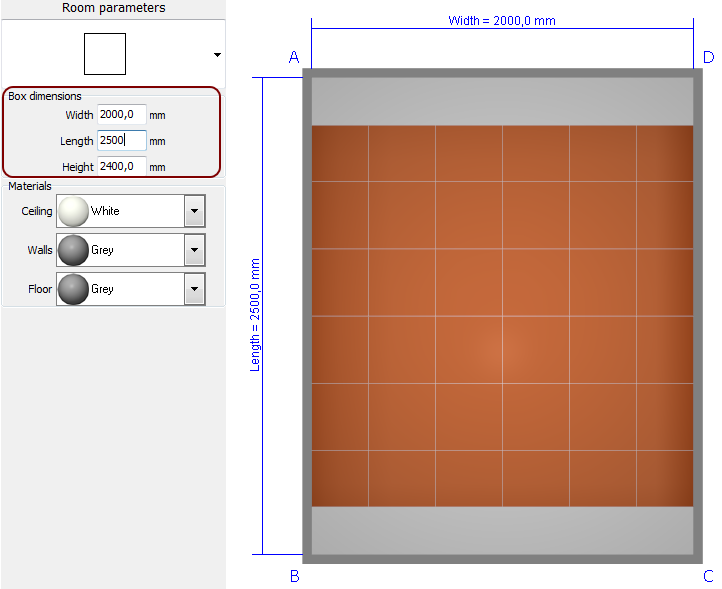

To change the size of the room:
- click in one of the wall;
- drag the wall.


If the dimensions are increased in a big way, part of surface (usually the floor) can be unfilled with tiles.
To fix this:
- go into the «Tiling»;
- highlight the surface with right click on the mouse where blank area formed, and from the context menu, select «Fill free space.»
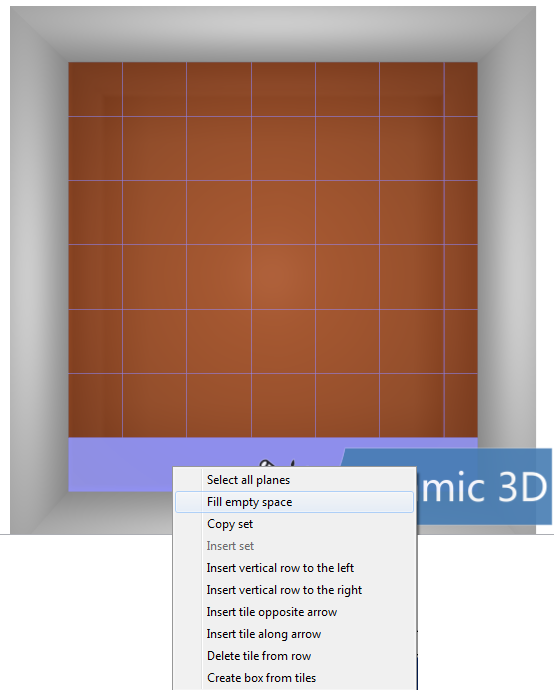

Missing tiles will be placed.
Box and placing tiles on it
In the «Tiling» mode, ther is the possibility of constructing an object «box». More complete, this function is implemented in the mode «Installation of objects».
To create a box, the wall should be filled with tiles.
- Highlight the tile, which should be closed by the box, and click the right mouse button on the selected segment:
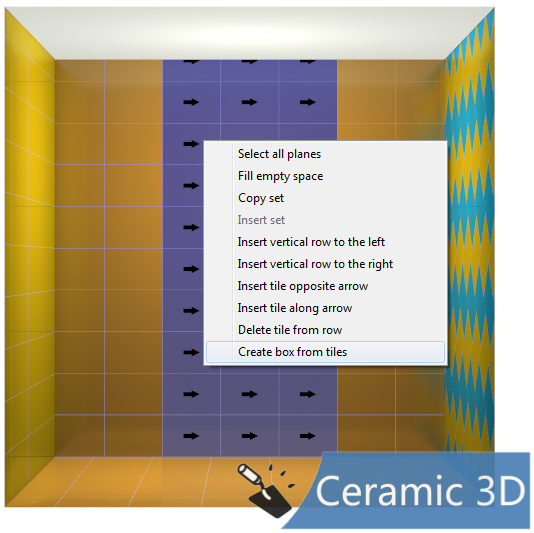
- Select «Create box from tiles». A dialog box will appear:
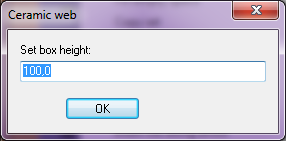
Here, select the desired depth of the box. (The distance at which it must move away from the wall.)


The result is as follows:

After that, you can place tiles on the box (all the rules of tiles placement remain unchanged):

To delete a box or move it, go into the «Installation of Objects» mode. In this mode, you can work with the box as with any other object: modify, move, rotate, delete.
However, you can place tile on it only in the «Tililg».
However, you can place tile on it only in the «Tililg».
eng_web/tile_placement.txt · Последние изменения: 2020/09/28 22:37 (внешнее изменение)